Realistic Material Wetness
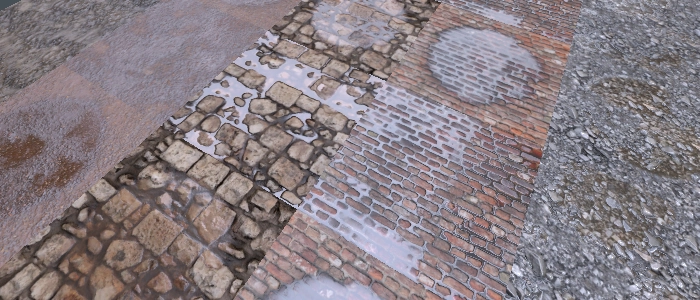
We can easily distinguish between a dry and wet surface. The best visual cue is that wet surfaces look darker, have a higher specular value, and exhibit subtle changes in saturation.
This behavior is made by rough/porous materials (brick, clay, concrete, plaster...), Absorbent materials (cotton, fabric), and organic materials like hair. Materials that are smooth don't change however since they are already reflecting a lot of light.

Darkening the albedo
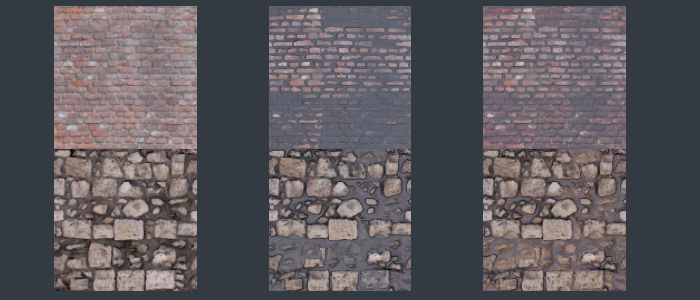
When looking at all the visual cues of wet materials, we can see that the surface looks darker. This depends on how porous the material is and how much light is absorbed. Another thing we can see is that brighter diffuse values stay bright but everything else darkens. At first, it seems reasonable to multiply to diffuse factor with a scalar value depending on the wetness. The problem with this method is that bright diffuse colors lose more color than supposed to and the materials appear rather black instead of darker.
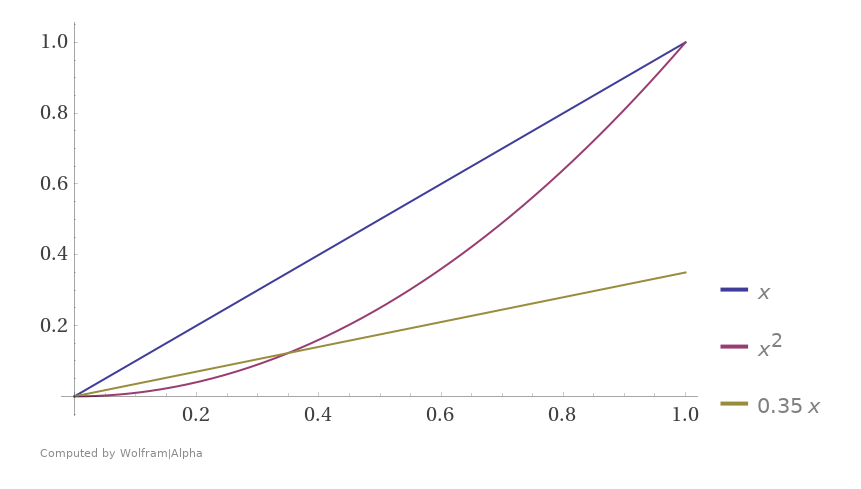
A better way to darken the diffuse is to square it. This makes the brighter AND the darker colors lose less value while others at around 50% will be adjusted more accurately. Below you can see a graph that shows the difference between a squared diffuse and a diffuse multiplied with a low value (0.35 here).


Input properties
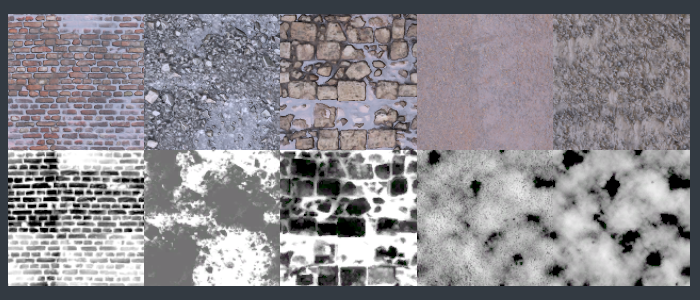
To keep the input intuitive for artists, we use as few material properties as possible. To control the wetness on the material itself we use a single greyscale texture that the artists can paint to keep visual consistency, physical correctness and still keep things intuitive.
We also use a single wetness float to scale the mask so we can dynamically change it via gameplay. Below you can find a visualization of multiple wetness masks.

| Property | Type | Description |
|---|---|---|
| Wetness | Float | This drives the transition between the different phases and also acts as a scalar value of the wetness mask |
| Wetness Mask | Greyscale Texture | This controls the material wetness |
The Shader code
Here’s the shader code. The artists have control of the wetness parameter whereas the porosity parameter is the material’s roughness value. Wetness drives the transition and the porosity darkens the base color. To darken the material we lerp to a squared version of the base color. This is a reasonable approximation of the darkening and more accurate if we would multiply the base color with a low grayscale value.
We also force the vertex normal to point straight up of the wetness value gets above 98%. This convinces the player that the surface of the pool is flat like water.
References
The Technical Art of Uncharted 4
Physically based wet surfaces
Texture Assets from:
Textures.com
TextureHaven
Get the source files on Github